Guide
JSON Prompt Engineering
Complete reference for Nano Banana 2/Pro and GPT Image 2. Covers the JSON formula, six core use cases, the Amazon and Shopify listing pipeline, and the decision tree for choosing between models.
“amber serum bottle on marble, but make the background sage green”
Re-roll and the bottle shape, label and lighting drift too. You fight the model.
{
  "product": { "item_name": "amber serum", "material": "glass" },
  "environment": {
    "background_style": "marble" → "sage green"
  },
  "studio_lighting": { "mood": "soft, clean" }
}
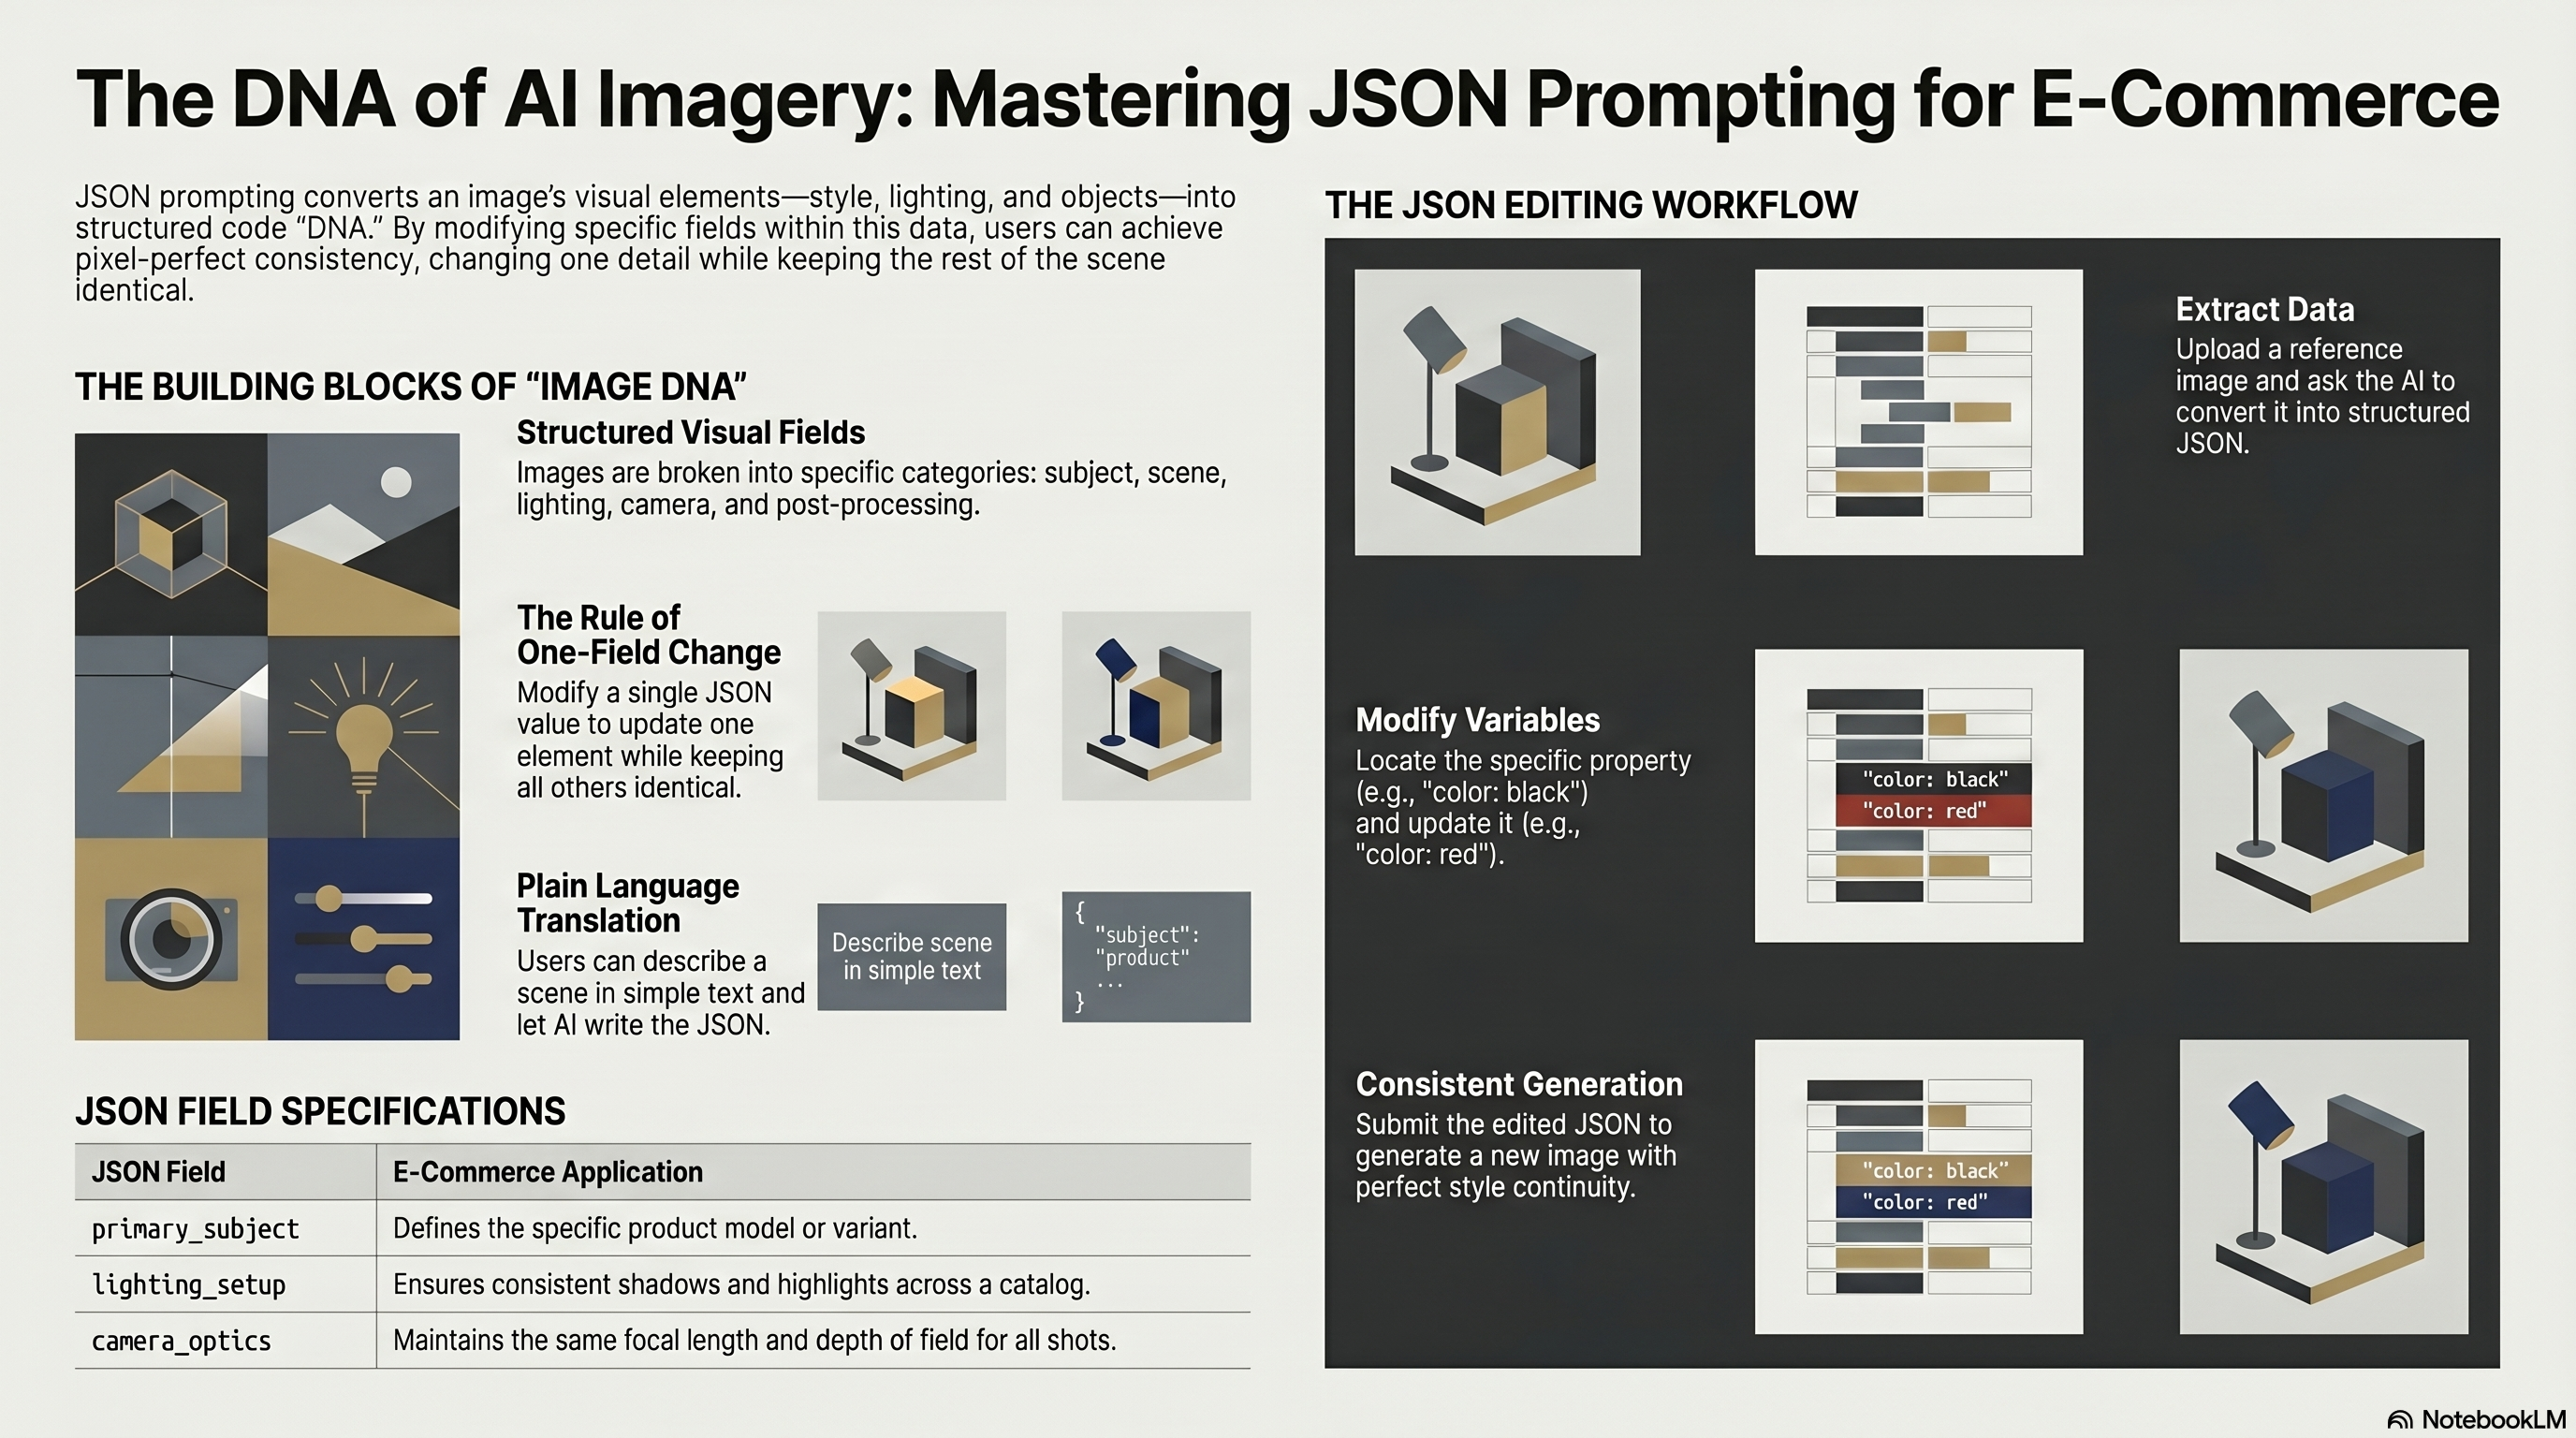
Change one field. Everything else stays identical.
Start from 3,000+ prompts, or turn any idea into JSON.
Tweak 7 plain fields — or the raw JSON.
Save your product so it stays identical.
Nano Banana or GPT · A/B · batch.
Variations & white-background swap.
Watch: the JSON method
Why JSON Prompting
A regular text prompt dumps subject, scene, camera, lighting, and mood into one blob. The model has to untangle it on every generation — which is why asking for one small change often breaks everything else you got right.
JSON separates every element into its own labelled field. When you change one field, the model knows exactly which slot to touch and which to leave alone. The result is deterministic, version-controllable, reproducible.
Why it works specifically on Nano Banana 2
NB2 runs on Gemini's reasoning architecture. It understands relationships between elements rather than just matching keywords to pixels. JSON is its native language. Midjourney, built for aesthetic exploration, performs worse with heavy structure — do not use this method there.
NB2 also has real-time web access during generation, so you can reference current products, trending visual styles, and recent events. Midjourney and GPT Image 2 cannot do this live.
The JSON Schema
Start by extracting the schema from any reference image. Upload to Gemini and run:
Extract all the information from this image and convert it into structured JSON.Gemini returns the image's “DNA” — every object, material, colour, position, lighting setup, and camera configuration as structured fields. This is your editable baseline.
Full schema shape (Nano Banana 2/Pro)
{
  "subject": {
    "primary": "woman, early 30s",
    "secondary": ["leather tote bag"],
    "pose": "standing, slight three-quarter turn",
    "expression": "composed, direct gaze"
  },
  "objects": [
    {
      "id": "obj_1",
      "type": "armchair",
      "material": "linen",
      "color": "cream ivory",
      "position": "foreground left",
      "proportions": "standard"
    }
  ],
  "photography_style": {
    "lighting": "soft diffused natural light from left window",
    "composition": "rule of thirds, subject offset right",
    "color_palette": ["warm ivory", "muted sage", "walnut brown"],
    "optics_and_focus": "85mm portrait lens, f/2.0, subject sharp, background bokeh",
    "post_processing": "slight desaturation, lifted shadows, matte finish",
    "hardware": "Hasselblad H6D, Kodak Portra 400 film emulation"
  },
  "lighting": {
    "sources": ["large north-facing window", "silver reflector camera-right"],
    "color_temperature": "5500K daylight",
    "shadow_direction": "soft, trailing right",
    "weather": "overcast"
  },
  "camera": {
    "focal_length": "85mm",
    "aperture": "f/2.0",
    "perspective": "eye level",
    "focal_point": "subject's eyes"
  },
  "style_lock": [
    "same armchair position",
    "same window light direction",
    "same color palette"
  ]
}
The style_lock array is a non-negotiables list. Everything listed there is treated as fixed across regenerations. Put your most important constraints here.
6 Core Use Cases
1. Surgical colour and material swaps
Extract the full JSON, find the target object's colour or material field, change it, and regenerate with: “Modify this image based on the following JSON.” Only the edited field changes — position, perspective, lighting, and all other objects are untouched.
// Original
"armchair": { "color": "cream ivory", "material": "linen" }

// Change colour only
"armchair": { "color": "deep burgundy", "material": "linen" }

// Change both
"armchair": { "color": "forest green", "material": "velvet" }
2. Photography style transfer
Extract a photography-technique-only JSON from any reference shot with: “Describe the photography techniques in this image in JSON format.” What comes back captures lighting setup, colour grading, lens character, grain, and post-processing style — not what is in the image, but how it was shot. Apply it to your own subject:
Generate a photo of this person based on the following JSON.

[paste photography_style JSON here]
Save your best style JSON as a template in the Generator. Every future generation in that style reuses the same block without rebuilding it.
3. Character consistency (character bible)
NB2 natively supports up to five characters and 14 objects using up to 14 reference images. For consistent characters across scenes, create a locked character bible block and paste it verbatim into every new prompt — only the scene, lighting, and outfit fields change.
{
  "character": {
    "id": "char_A",
    "age": "early 30s",
    "ethnicity": "East Asian",
    "hair": "dark brown, shoulder-length, loose waves",
    "distinctive_features": ["small mole above left lip"]
  },
  "style_lock": [
    "same face structure",
    "same hair colour and length",
    "same mole position"
  ]
}4. Lighting, weather, and time of day
Isolate the lighting section of your JSON. Changing weather or time of day only in that section prevents the model from restructuring the scene to “prove” the change. Watch for fields that force the model's hand — words like visible, dramatic, exposed push it to alter composition. Tone those down and your scene holds.
"lighting": {
  "sources": ["large north-facing window"],
  "color_temperature": "3200K warm tungsten",
  "shadow_direction": "long, trailing left",
  "weather": "overcast evening"
}
5. Object swaps that respect the scene
Extract a furniture-focused JSON from the original room (includes proportions, dimensions, spatial coordinates). In a second chat, extract a JSON of the replacement object. Merge them with: “Swap the existing armchair in JSON A with the chair from JSON B, preserving the original room's lighting and perspective.” The shadows from the scene land correctly on the new object. You cannot do this with text prompts without burning 20 generations.
6. Camera perspective transfer
Extract only the camera JSON from any reference image — focal length, aperture, perspective distortion, focal point placement — nothing about the scene itself. Apply it to a completely different scene. The model maps the cinematographer's lens choice onto your content.
"camera": {
  "focal_length": "24mm",
  "aperture": "f/11",
  "perspective": "wide-angle, slight distortion at edges",
  "focal_point": "centre frame"
}Reference Library
The reference library is not only inspiration. It is the visual starting point for the workflow. Browse references first when you know the product but do not yet know which image format to create. A strong reference helps you decide whether the shot should be a main image, clean Shopify product image, lifestyle scene, exploded view, feature callout, scale image, box contents layout, or comparison image.
ProductJSON Studio ships with 3,004 reviewed ecommerce references. The launch upgrade adds 240 generated 2K marketplace-format references across 30 product types. Each new reference is designed to teach one practical ecommerce image pattern rather than simply make the gallery larger.
In the app, open Inspiration to see the 240 generated marketplace examples listed first inside their matching ecommerce categories, alongside the reviewed library.
Amazon and Shopify Listing Images
Use this workflow when you already have product photos and need a complete listing image set. The pipeline works in two phases: generate and approve the main image first, then build the secondary set from that approved image so the product stays consistent across the full gallery. Open the Listings Pipeline tool and choose Amazon or Shopify at the top of the panel.
Before you start
Upload at least one clear product photo; three to eight references are better when you have front, side, detail, packaging, and scale angles. Add the brand, product name, listing title, bullets or description, and product accuracy notes. The accuracy notes are where you lock the details the model must not invent: shape, finish, logo treatment, materials, proportions, colours, accessories, and anything the reference photos do not make obvious.
Choose the right platform mode
Use Amazon when you need a marketplace-safe image set with strict main-image rules. Use Shopify when you want a brand-led product page gallery with warmer styling, lifestyle scenes, and reusable assets for your own store.
Load product facts and references
Add reference photos, product details, bullets, and accuracy notes before you generate. For Shopify, also fill the Brand Style field with the store mood, colours, or art direction you want the gallery to follow.
Generate and approve the main image
Amazon generates main candidates for a clean product shot. Shopify starts with a clean hero image. Select the most accurate version only after checking product identity, scale, colour, material, label shape, and silhouette.
Build the secondary set
Once the main image is approved, generate the secondary images. The tool reuses the approved main as the locked product reference, then produces lifestyle, feature, close-up, scale, packaging, and brand-gallery style images from it.
Regenerate weak slots, then download
If one tile is off, regenerate that slot instead of restarting the whole set. Download when the images look like one coherent listing and all products match the approved main.
Amazon mode
Amazon is compliance-first. The main image should be a clean product image on a white background, with the product fully visible, no props, no badges, no extra claims, no watermarking, and enough resolution for marketplace zoom. Secondary images can explain features, scale, what is in the box, use cases, and close-up details, but they should still avoid claims the listing cannot support.
Shopify mode
Shopify is brand-first. Use the same product facts, but let the Brand Style field carry the store mood: for example “warm cream minimal, soft daylight, premium wellness, editorial still life”. Shopify outputs should feel like a product page gallery: clean hero, lifestyle, detail, scale, packaging, and brand-led editorial images that match your site rather than a marketplace template.
Quality gate before export
NB2 vs GPT Image 2
GPT Image 2 is a completely different architecture — not an incremental update. It runs natively inside ChatGPT in two modes: Instant (fast, free tier) and Thinking (paid, lays out the image before generating, runs live web search for fact-checking, can produce up to eight images with the same persistent character from one prompt).
Across 10 head-to-head rounds with identical prompts, GPT Image 2 leads Nano Banana 2 by 242 Elo. But Elo score does not determine which model to use — the task does.
Treat this as model-eval routing for the reference library. When a reference style matters, compare the same JSON intent across Nano Banana 2 / Pro and GPT Image 2, then keep the model that preserves product identity, composition, text behaviour, and marketplace format most reliably for that image type.
Pricing reference
Nano Banana 2: $0.08 per image at standard resolution via API. Nano Banana Pro: $0.15 per image. Free tier: up to 20 images/day at 1K resolution (no API key required in the Gemini app). 4K output requires the paid API.
Per-category routing (Magnific eval, May 2026)
The decision tree above came from public head-to-head rounds. We ran our own multi-category eval on Magnific at 2K — 4 categories × 2×2 axis matrix (text vs no-text, cinematic vs non-cinematic) × 2 models = 32 generations against 16 human reference shots. The total gap collapsed to +1.31 / 50 avg in favour of GPT Image 2 once each model was fed its own template (NB-Pro reading nbpro_json, GPT reading gptimage2_json). Per-category scores out of 200:
Two counterexamples worth knowing.When the JSON specifies text on a prop (a sign on a vendor cart), NB-Pro respects the placement — GPT defaults to moving it onto a wall. Conversely, on briefs that name a single item (“one dropper bottle”), NB-Pro can hallucinate count (rendered two). If text placement or item count is brief-critical, pick the opposite default for that specific shot.
How the Studio surfaces this: each inspiration card carries a small GPT or NB-Pro tag in its corner, and a matching chip appears next to the model toggle once you load a card. The Studio never changes your selected model automatically — the choice stays yours.
nbpro_json and gptimage2_json, the text-vs-no-text gap (+1.0 avg) was actually smaller than no-text (+1.63). Cinematic vs non-cinematic was within noise. The remaining gap is detail-rendering quality, not interpretation — which is why category (label complexity, scene density) is the right axis to route by.Quick Reference Rules
Ready to use it